Search This Blog

Categories

Wednesday, March 28, 2012

My Grandma's Recipe for Seasoned Crackers


I usually fill a small snack bag half full of this stuff so in the end, you'll have about 20 bags. To make these, you'll need:

2 pkgs. Oyster crackers
1 cup oil (I use vegetable)
1 teaspoon dill weed
1/2 teaspoon pepper
1/2 teaspoon garlic powder
1 pkg. Hidden Valley original dressing (I just recently made this recipe with a generic ranch packet and FYI, it tastes the same.)

Preheat oven to 300 degrees. My grandma's instructions say to put all the ingredients in a plastic bag and shake until the oyster crackers are well coated. I usually mix all the ingredients except the crackers in a small bowl. Then, in a large plastic bowl, I put the wet mixture and crackers together. Cover. Shake until all the oyster crackers are well coated. Spread the crackers on a baking sheet. Bake for 15-20 minutes. Let cool. Serve! They're delicious!

Tuesday, March 27, 2012

CARS birthday party

This past weekend was my son's 2nd birthday and party. He loves Cars so of course I had to do what would make him happy. We bought some decorations from Party City, but some decorations were homemade. I made signs for all the food and printed them off from Walmart.com as 4x6 pictures. You can take the ones I made and print them off for yourself if you'd like. Here they are: TO MAKE THE PICTURES LARGER, CLICK ON THEM
(We put this on the lemonade)


(This is for dark soda. We ended up just putting it on a cooler full of cans.)
(We went to Subway and bought 4 footlongs -2 ham, 2 turkey- and had them cut into 3 inch sections with all the toppings put on the side.)
(Stoplights are just Rice Krispie Treats dipped in chocolate and topped with Red, Yellow, and Green MnMs. They're delicious!)

(We made popcorn while we played the movie.)

Since my son was only turning 2, we didn't really have any games, but we did leave some extra balloons just lying around to play with. It seemed to really entertain the kids.

I made signs for the different food and drink stations.


(This sign was for beer and sangria. You might find that this isn't apropriate for the party that you're throwing, but our party only had 2 children and 11 adults.)


(We had this party at my sister's house. I made the cake at my house, which is 2.5 hours away, and my cake kind of came apart a little on the way to her house so I'll show you a picture of it before we left.)

That's pretty much it! We had some other store bought decorations and my son already had a card table set with two chairs that was Cars themed so that fit right in. Our party was a success! I hope yours is as well!

Friday, March 23, 2012

Thomas the Tank Engine Birthday Cake

My son is turning 2 tomorrow. I'm so proud of him and how smart he is (I know I'm biased, but what parent doesn't want to believe that their child is just the smartest kid in the world?!?!). The years have gone by so fast. For his second birthday, we're doing a CARS theme. He's only 2 so I know he won't fully appreciate everything we're doing, but who cares. I'll post all the decorations later, but today, I'm going to talk about the cake I made for his first birthday.
This cake is really easy. Anyone can make it. I got a lot of compliments. However, I fully believe that anyone can do pretty much anything, they just need to get off their butts and do it.
I just used simple chocolate cake mix. Make sure that you grease your pan, flour it generously, and let it cool completely before taking your cake out to make sure it doesn't fall apart.
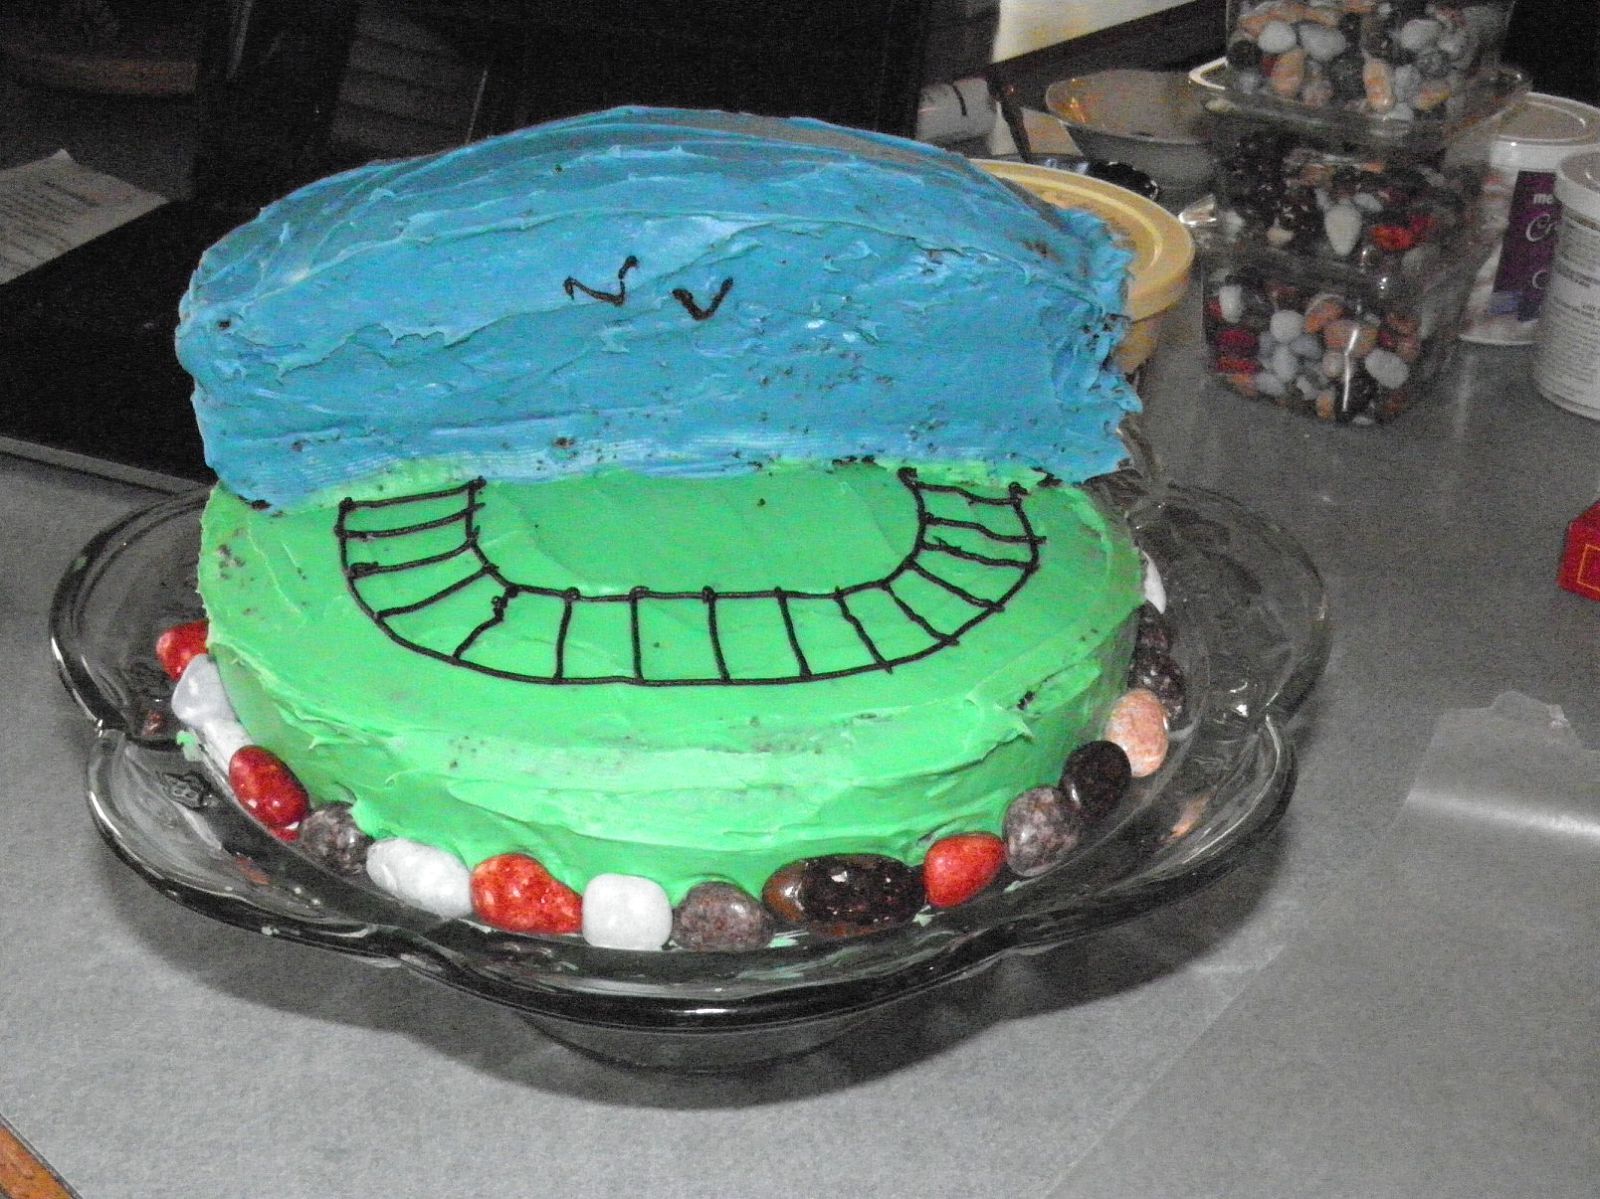
After you have both layers of your cake done, cut one in half. Stack your cake so that it's 1 layer on one side and 3 layers on the other side. You can put your icing on now. I put green on the bottom layer for the grass and blue on the top two layers for the sky.
I found some chocolate rocks at Walmart. If yours doesn't have any, they might have some at a Fresh Market or something (or if you plan far enough in advance, you can order them off the internet).
I put the rocks around the bottom. Then, for the tunnels, I melted some chocolate and put it on wax paper so that it doesn't stick. Then, while the chocolate is still melted, put rocks in a U shape. I made 3 in case one of them broke.
Before they were completely solid, I cut the extra chocolate from around the rocks. Then, I put them in the freezer to make them extra solid. While those were drying, I piped some railroad tracks and some birds onto the cake.
Then I added some white frosting to the top. It kind of gives the illusion of clouds. I added some candles. My mom had the "1" so I'm not quite sure where that came from, but I was able to get the "O-W-E-N" and the train from Party City. The top is the best place for candles. If you don't put anything up there, it looks a little plain.
When the tunnels are finally done, you can add those to the cake.
I added some extra green around the edges and a few rocks. Now you can add your Thomas the Tank Engine to the cake. This was the only one I could find. Of course, the week after his birthday, I saw one in Target that was half the size. It would have looked a lot better.

Friday, March 16, 2012

First Dance Picture

FYI: I am in desperate need of a manicure, but unfortunately, that didn't occur to me before I did this project. Also, my handwriting isn't that great, but I suppose writing it myself helped to add some personalization to it.


Step 1: Get everything together. (1 picture from your first dance at your wedding, 1 frame that's larger than the picture you have, a couple pieces of white cardstock, and a pen)
Step 2: Measure your cardstock so that it fits inside of the frame. (I only suggest having multiple pieces of cardstock in case you mess up on the first one like I did.) Measure and cut out a hole in the center of the cardstock that measures to the size of your picture. I used an 8x10 frame and a 4x6 picture. I decided to make my picture black and white and the frame silver. I thought it added a little something. However, I'm sure it would look nice if the picture was in color and you used a frame that was your wedding colors.
Step 3. Write the lyrics on your cardstock. I learned that it looks better if your write a little larger. My lyrics could probably be bigger. Oh well. You might notice that some of my words are darker than others. The truth? I messed up on one of my words and without thinking about it, went over it about 4 times before I realized it would stick out like a sore thumb. It was at the end so instead of starting over (for the third time I might add), I decided to do it randomly and I didn't hate it! You do whatever you think looks best.
Step 4. Tape the picture into place.
Step 5. Put the whole thing in your frame. And you're done! Voila!
Now you've made your first dance picture a little more interesting (Not that you really needed to). Plus, you'll never forget what song you danced to for your first dance (Although I'm sure you'd need to worry about your husband forgetting, not you).

Tuesday, March 13, 2012

Garlic Potatoes

I made this for my husband one night and he LOVED it!

You will need:
potato
garlic salt
vegetable oil
butter/margarine
pepper

Step 1. Preheat oven to 425 degrees. Skin the number of potatoes that you wish to bake. I made 2, but you could just as easily make 5 or 10.

Step 2. Lay your potato down on a cutting board. Wherever it rests is where you need to cut it. (If it doesn't sit still when you put it on the board, the potato will roll around while you're baking it and this won't work.) Cut most of the way through the potato like you were making au gratin potatoes, but not completely through.

Step 3. I didn't measure my amounts so these are approximate, but mix together 1/4 cup melted butter, 1/8 cup oil, a pinch of pepper, and 1 tablespoon of garlic salt.

Step 4. Spoon the mixture over the potatoes. Try to get as much of the mixture into the cracks as possible.

Step 5. Bake for 40 minutes. Let cool. Serve.

Monday, March 5, 2012

Chocolate covered oreos for a bridal shower.

My sister found a picture of something like this online and made them for my wedding shower. They were delicious and cute! OREOS BIRTHDAY WAS MARCH 6TH, 1012 SO THEY ARE NOW 100 YEARS OLD!

For this project you will need:
Oreos
White chocolate (I used almond bark)
Dark Chocolate (you can use milk chocolate, but it melts so much faster and doesn't get as hard as dark chocolate)
pearl sprinkles (I found mine at Kroger)
white writing icing
black writing icing (while the writing icings are not necessary, they will come in handy when decorating the oreos)

Step 1. Coat all oreos in white chocolate.
Step 2. Dip the sides of half of the white chocolate covered oreos in dark chocolate.
Step 3. Use the black writing icing to add a bowtie and buttons. You are now done with these oreos. All that's left is to let them dry.
Step 4. Use the white writing icing to add details to the other half of white chocolate covered oreos.
I pretty much just did squiggles, but for people more talented than I am, I'm sure you can do whatever you want to decorate these.
Step 5. Add dots of white writing icing to make a necklace. Place pearl sprinkles on these dots. Now you're all done with the "bride" oreos.
As soon as your oreos are dry, you can package them and use them as favors at a shower or the wedding itself. For packaging, I bought my bags at dollar tree. They were too large so I cut them in half and then used ribbon to tie them off.