Well, they haven't gone anywhere! You can still buy them, people! And they're just as cool as ever! I buy mine off of Amazon. Now, you can buy name brand still. But I buy these cheaper ones. They come in clear and white.
Some ideas for how to use them:
1. magnets – we made Christmas ones!
2. necklaces and bracelets
3. keychains – I put these together because the only difference is the length of the chain they're attached to. I made this one with ink and my son's fingerprints.
4. brooch – clearly these are not going to be as fancy as the ones your grandma used to own, but they will be personal and interesting and cheap and easy.
These are quite easy to make. Simply follow the directions on the package! I use permanent markers and permanent inks to make designs on the paper. Then, cut them out. Punch a hole if you plan to make it into a necklace, bracelet, or keychain. Now put them on a baking sheet covered with parchment paper and put them in a preheated oven. Watch them shrink before your very eyes! Take them out when they're done (about a minute or two). Attach a chain or magnet or whatever you need to finish your project! You're done!
Sunday, May 22, 2016
Saturday, May 21, 2016
Minion Party Favors
It's been 3 weeks since I last posted. So, now that I'm back, I am ready for some fun stuff!
I for some reason absolutely love party favors. I know a lot of people think that they're a complete waste of time and money, but seriously, don't you kind of wish that you could go home with a swag bag after every party you attended? I think that would be pretty cool. I have been collecting things for 3 months to put in these favors for a couple reasons. 1. This helps to spread out the cost. 2. I buy things as I see them. And 3. I have been planning his party for 3 months and I keep getting new ideas; so every time a new idea comes, I collect something new!
In the past, I have put together really cheap favor bags that cost me maybe $1/bag and I just didn't feel like doing that this time. I wanted things that kids would really enjoy instead of some cheap favor toys that parents would throw away as soon as they got home.
So here are the amazing bags that I put together and the price breakdown of everything:
1. Yellow Reusable Bag = $1.75
2. Happy Birthday Cup = $1.60
3. Minion Playpack = $1
4. Fruit Snacks = $0.40
5. Minion Bracelet = $1
6. Candy necklace = $0.50
7. 2 pieces of Minion candy = $0.15
8. Minion sticker sheet = $0.40
9. Goody bag from the zoo = FREE!
Total = $6.80
Now, that may seem like a lot to you, but these are just some ideas. I go above and beyond what most people do for birthdays. And I'm sure everyone has their favorite thing. Mine happens to be gift bags.
Just for fun, let's take a look inside the goody bag that the zoo sent home with everyone! It looks like this:
Contents: Activity Page (coloring, word scramble, maze, code puzzle, word find), Color by Number at the Zoo Coloring Book with stickers, Paddleball Game, rubber bracelet, stamp, pencil topper eraser, ruler, 3-pack of crayons, and a coupon for one free youth admission to the Miller Park Zoo.
Sunday, May 1, 2016
Summer Bucket List
It's officially May. It's time to start thinking about summer fun! And if you're like me, you have almost every weekend planned for your summer already.
Every year, we like to make a list of things we want to do during the summer. That being said, we don't always do everything on the list. We just try to do as many things as we can! It helps us make the summer fun and keeps us from getting bored. And since school ends in just a couple weeks (about 3 for us!), I thought now would be a good time to make our list! Scroll through the list to see if there's anything you might want to add to your summer bucket list!
30 Items to Put On Your Summer Bucket List This Year:
1. See a Drive-In Movie
2. Have a Water Balloon Fight
3. Go play Mini Golf
4. Swim in the Pool
5. The Beach
6. Visit Family
7. Slip & Slide
8. Backyard Camping
9. Make S'mores
10. Go hiking
11. Go for a paddleboat ride
12. Wash the car
13. Go Bowling
14. Go to the Farmer's Market
15. Go on a roadtrip
16. Watch fireworks
17. Take a train ride
18. Make homemade popsicles
19. Go to a baseball game
20. Visit a carnival
21. Go to the zoo
22. Visit the children's museum
23. Go fishing
24. Walk through botanical gardens
25. Go to some horse races
26. Go to an art's festival
27. Visit an amusement park
28. Have a photoshoot
29. Make cookies
30. Go to a kids building workshop
I really hope that your summer is awesome! Just like I'm sure that ours is going to be. I'll let you know at the end of the summer how many of these things we ended up doing!
Sunday, April 24, 2016
DIY Lanyard
For my son's minion birthday party, I made some super easy and cheap minion lanyards. I think I made about 16 of them in an hour. It took no time at all. And with just a little bit of effort, you can make them look way better than mine did.
Here's what you need:
needle and thread
minion ribbon
lobster clasp hooks
Step 1: Cut your ribbon. I was making these for kids in kindergarten and younger so I only cut about 28-inch pieces. However, it is best to measure what is going to work best for you. A lanyard should hit right above your tummy when standing.
Step 2: Put your ribbon through the hole in the clasp hooks and fold it up to the back.
Step 3: Sew the ribbon closed around the hook.

Step 4: Add your name tag and wear it!

See? Wasn't that easy? And the kids loved it! It was great!
Sunday, April 17, 2016
6th Birthday Party at Miller Park Zoo
This year, my son's birthday was held at the zoo. They have 2 options for parties. One is outdoor at their covered area right after you enter the zoo ($125 for 20 people for 2 hours; $7/person extra up to 40 people). The second option (the one we chose) is in the large classroom ($175 for 20 people for 2 hours; $9/person extra up to 40 people). Both of these options include a treat bag for each child. You can purchase carousel rides for $1 per rider. You can also get an animal encounter for 20 minutes with 2 animals of your choice (in advance) for $75. We were going to choose to add both of these add-ons to make our party experience complete, but it was raining that day so we decided to just get the animal encounter.
Members of the Miller Park Zoological Society receive a 10% discount.
My son wanted a minion party. And I think it turned out pretty great! (But that's a post for another time.) We called 3 months in advance and both times on Saturday were already booked. However, Sunday was wide open. We chose the later time (1pm-3pm) because the early one on a Sunday just seemed too early (10am-12pm). Well, we ran into quite the issue about 2 days before the party. They had double booked the room and accidentally written ours on the schedule from 10am-12pm. This was very stressful and I still get sick whenever I think about it. They did not handle this in the correct way at all. The simple fact is that we booked first so we should have gotten to keep the room. But no! That's not how it worked out. We ended up with a much smaller room that was half way across the zoo. It turned out to not be a HUGE deal, but I can tell you that after the party was over, I was definitely thinking about how the party would have gone much smoother if we had been in the larger room. They did, however, wave the fee for the animal encounter.
Overall, it wasn't the party that I wanted and I'm very disappointed in it. I would say that I wouldn't recommend using the Miller Park Zoo as your party venue. However, one of the employees did say that they're surprised this doesn't happen more often which leads me to believe it's not a very common occurrence so I suppose you could give it a try.


Sunday, April 10, 2016
The Coolest Cups Ever!
For my son's minion party, I thought it would be kind of cool to have some personalized (but not too personalized) cups to give as part of the favors. I found these cups on TotallyPromotional.com and I think they're amazing. So the cups are a frosted colored plastic cup that change to blue when you add cold liquid to it (they were blue when I got them because it was so cold outside!). I chose to use one of their clipart choices. It said Happy Birthday. I put that in yellow to go along with our yellow and blue minion theme. I then bought some lids and straws to go with these cups (little hands make easy spills). Everyone thought they were great! And like I said, they were personalized because they said Happy Birthday. But they weren't too personalized because like a lot of wedding favors, putting your name on things leads to favors that people aren't going to keep. Another way to use these cups outside of promoting your business is to commemorate a trip. We received a cup just like this when we went on a Disney Cruise when we participated in fish extenders. You could use them to commemorate a wedding (for the kids) or a family reunion or pretty much anything where you're hosting more than 20 people because that's the minimum order. I ordered 50 and am going to save the extras as birthday gifts for my students next year.
Saturday, April 2, 2016
Recipe: My Favorite Slow Cooker Meal
My husband and I have been making this slow cooker meal for a while now. I've tried a couple different ways of making beef and potatoes and this is definitely the most delicious. Well, let's just get right to it:
Ingredients:
1 small bag of baby carrots
2.5 lb bag of Honey Gold Potatoes
1 can of cream of mushroom soup
1 packet of dry onion soup mix
1.5 lbs of stew beef
Directions:
Layer the baby carrots on bottom, then the potatoes, and then the meet. Now pour the onion soup mix on top of everything. Then pour the mushroom soup and one can of water over top. Cook on low for 7-8 hours.
I hope you enjoy your meal as much as we do!
Sunday, March 27, 2016
I Spy Sensory Bottle for Preschoolers
So I made this really cool I Spy Sensory Bottle for my preschool kids and I thought I would share it with you. It was so easy! And fairly inexpensive, which is always a plus.
You will need:
Water bottle (I used this really cool one that you can find at any pharmacy or gas station)
beads
glitter
small objects (I used a penny, Olaf figure from dollar tree, button, snowflake bead, etc)
clear glue
super glue
warm water
Steps:
1. Remove all stickers and wrapping from bottle.
2. Take a picture of the items you want to use for the I-Spy.

3. Add all small items to the bottle.
4. Add clear glue to the bottle.
5. Add warm water to the bottom of the top of the bottle and shake. Warm water helps to dissolve the glue.
6. Add a little glitter to make the items a little harder to find.
7. Use super glue to glue the cap back on the bottle so that kids can't open it on accident.
8. Print off the picture that you took of all the items in the bottle and laminate it so that kids can use a dry erase marker to circle or cross out the items as they find them.
That's it! So easy, right? Now all you have to do is make like 20 more so that all the kids in your class can look at one at the same time!
Sunday, March 20, 2016
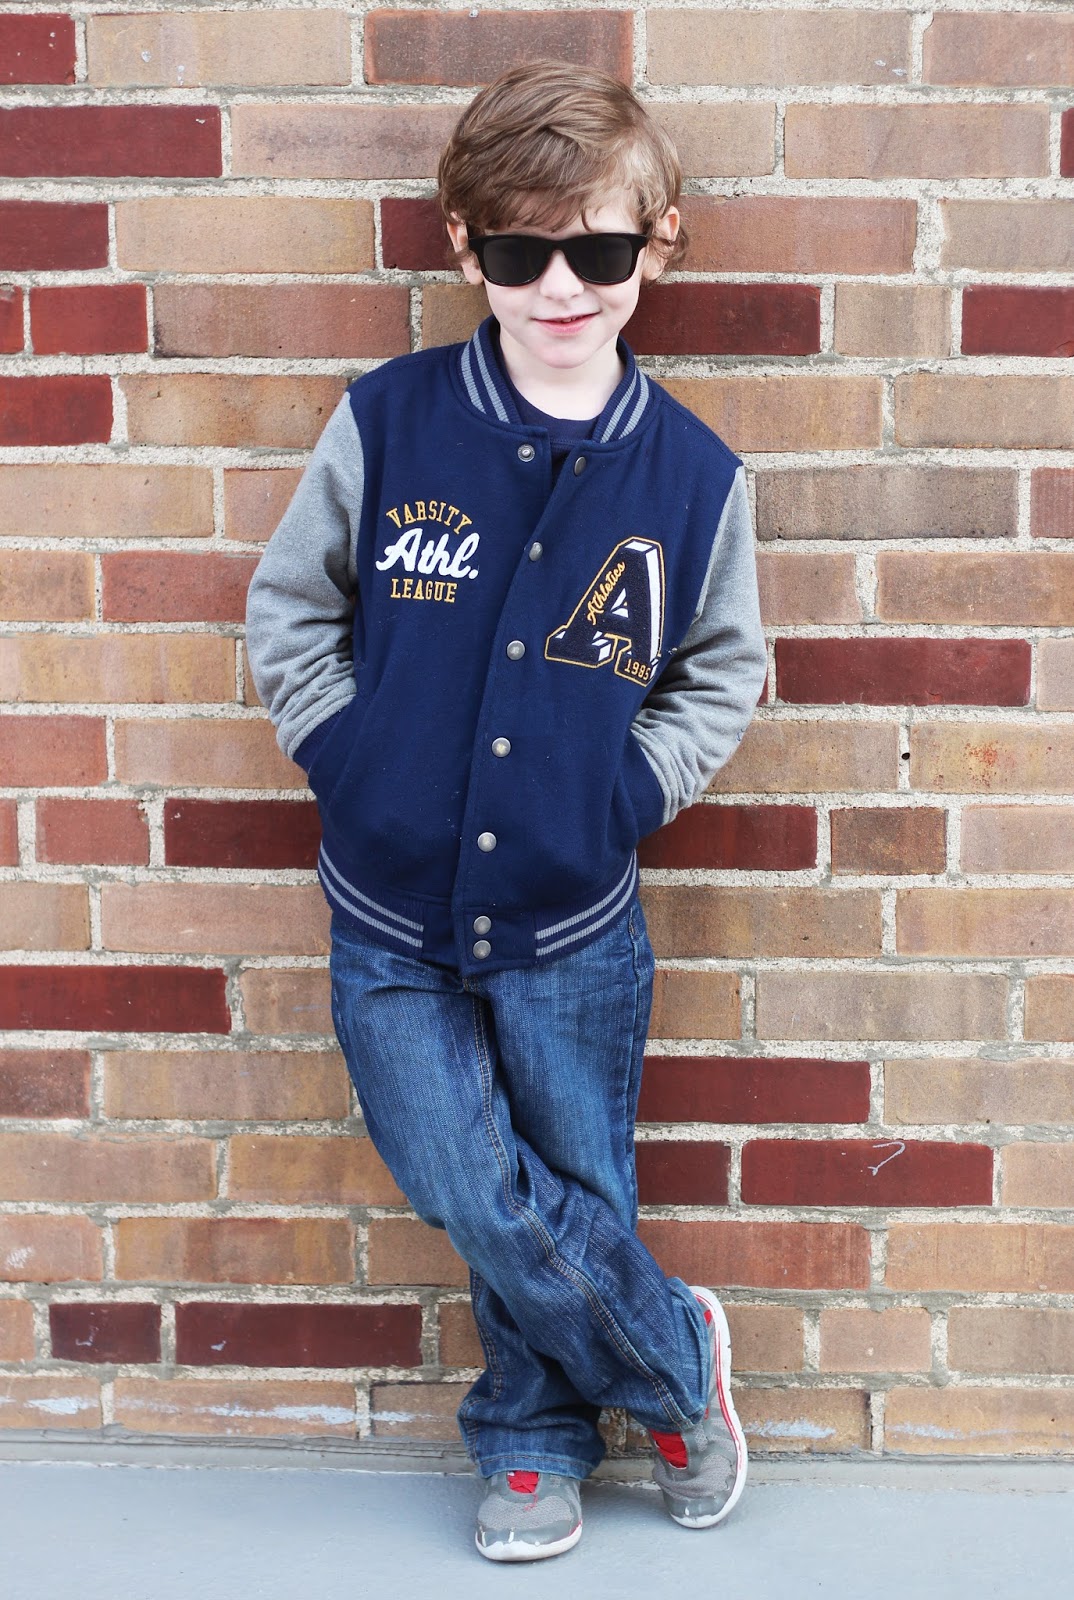
My son's 6-year pictures
Owen is about to turn 6 in a mere couple of days! Well, I always try to get his pictures done a couple weeks beforehand so that I can order prints and show them off at the party. After taking my son's pictures for about 4-5 years, I'm starting to run out of new locations for photoshoots for my son. But no worries. I found some new places! As for next year, we might just have to travel a little to get some amazing new backgrounds.
Anyway, my son was being a little bit of a brat during our shoot, but I think I still got some cute pictures. Ready to take a look? Here they are:


Anyway, my son was being a little bit of a brat during our shoot, but I think I still got some cute pictures. Ready to take a look? Here they are:


Saturday, March 19, 2016
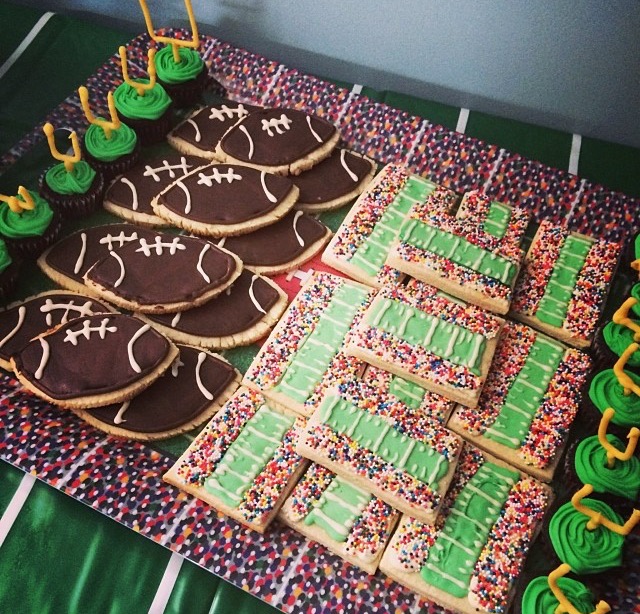
Recipe: Sugar Cookies
I use the same recipe every time I make sugar cookies and I always get compliments on them. I love these cookies. They taste good. They're easy to make. I see no downside. I've made these for baby showers, birthdays, Christmas, Super Bowl, etc.
Ingredients:
3 cups flour
1 tsp baking powder
1 cup unsalted butter
1 cup sugar
1 large egg
1 tsp vanilla extract
Steps:
1. In a separate bowl whisk together flour and baking powder.
2. Beat together unsalted butter and sugar. Once mixed well, add in egg. Mix again, then add in vanilla.
3. Slowly add in flour mixture about a cup at a time. Mix until dough forms and begins to clump together. (I don't always end up using all of it, so make sure you're paying attention. You can use the extra for dusting.)
4. Gather up dough and knead it with hands until it's nice and smooth. Roll it into a ball, wrap with plastic wrap, and place in fridge to chill. I like to let mine chill about 20-40 minutes. You will want it to be kind of firm, but not hard. If it's too hard, just leave it out on the counter for just a little bit until it softens up. Then you can work it a little bit to soften it back up. After I've cut all my cookies, I place them in the freezer for 3-5 minutes before putting them in the oven so that they don't expand at all when baking.
5. Bake at 350, time will depend on cookies size and thickness. Normally, between 7-11 minutes.
6. After they have cooled, decorate and eat!

Subscribe to:
Posts (Atom)